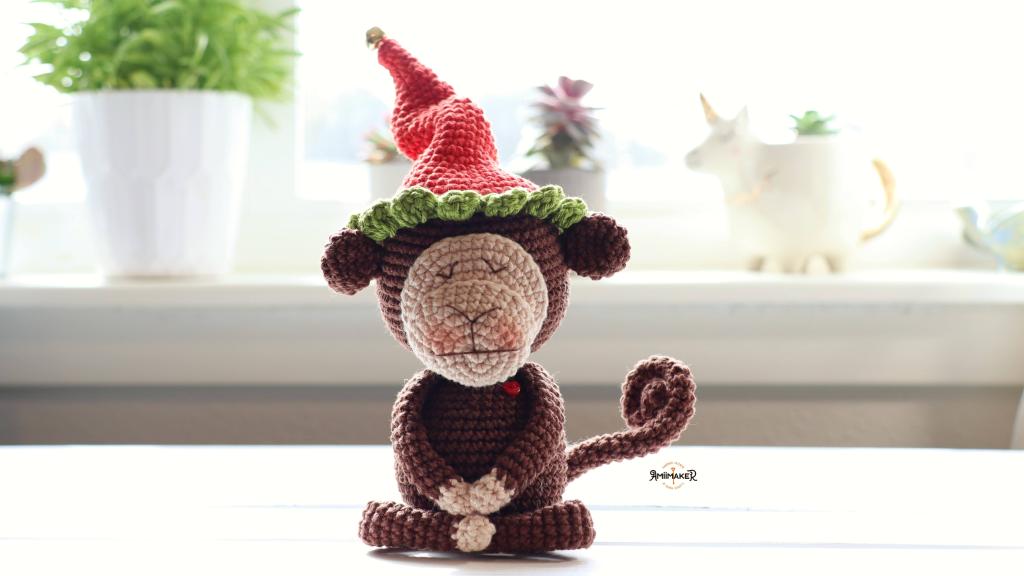
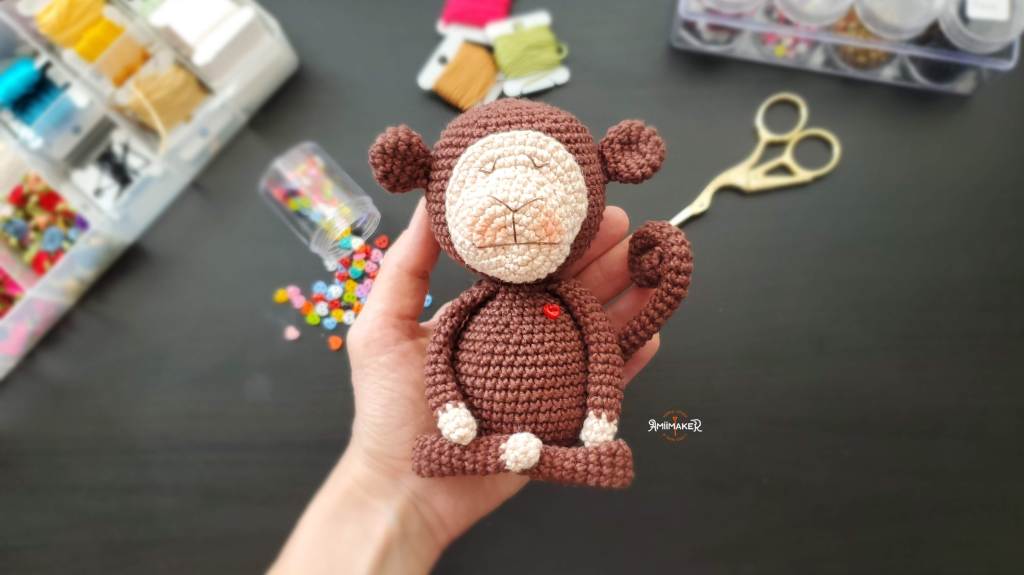
E agora, para o Natal, resolvi criar uma de chapéu de Elfo para o Macaquinho. Aí que resolvi juntar as duas receitas e colocar em um PDF só aqui no blog. Assim a gente já pode baixar, imprimir, salvar na nuvem etc…
Duas receitas em um único arquivo! Uma belezinha, não é mesmo?
Ahh, além disso, está rolando uma promoção de Black Friday na lojinha até o dia 02/12. Todas as receitas com 25% de desconto (exceto a receita do Nino e da Nina que já está com um super desconto até o dia 03/12). Não percam!
And now, for Christmas, I decided to create an Elf hat for the Little Monkey. Then I had the idea to join the two patterns and put them in a PDF here on the blog. So we can now download it, print it, save it to the cloud, etc…
Olha, eu tenho que admitir: eu sofro muito gravando tutoriais! Eu erro, recomeço, erro de novo, começo a suar, perco o humor, largo tudo, volto, recomeço mais uma vez e assim vai. Mas eu não conseguia encontrar uma maneira melhor de criar esse tutorial do que por vídeo, então tomei coragem e fui. Não preciso nem dizer que foi sofrido pra caramba né?!
Mas acho que valeu a pena. Isso tudo porque, na minha opinião, bordar amigurumis pode ser um mistério, principalmente quando somos iniciantes. Eu lembro que a primeira vez que bordei algo em um amigurumi, foi um focinho em um coelho de tricô que eu fiz em abril de 2015. Fazer o coelho era fácil, pois era só um quadrado que depois de algumas amarrações virava um coelho. O caldo entornou quando chegou o momento de bordar o tal focinho. Eu sofri, perdi horas do meu dia e desperdicei muito fio. Cansada de dar tanta cabeçada, comecei a procurar algum tutorial no YouTube. Mas não encontrei nada.
Terminei o coelho e só mostrei pro Gustavo e pra minha mãe. O pobrezinho ficou detonado. Dei fim nele antes do Celso nascer (acho que por medo dele chorar quando visse o coelho… Hahahahahahaha!)
Hoje, anos depois, bordar um detalhe em um amigurumi já não me assusta (tanto). Nem sempre eu acerto de primeira, mas a chance de não dar certo costuma ser bem baixa. Os anos de prática foram trazendo intimidade com a técnica. E, talvez, essa seja a dica mais valiosa de todas: pratique. Comece bordando detalhes pequenos como sobrancelhas, por exemplo. Procure sempre bordar algo para não perder a mão e aos poucos tudo fica mais natural.
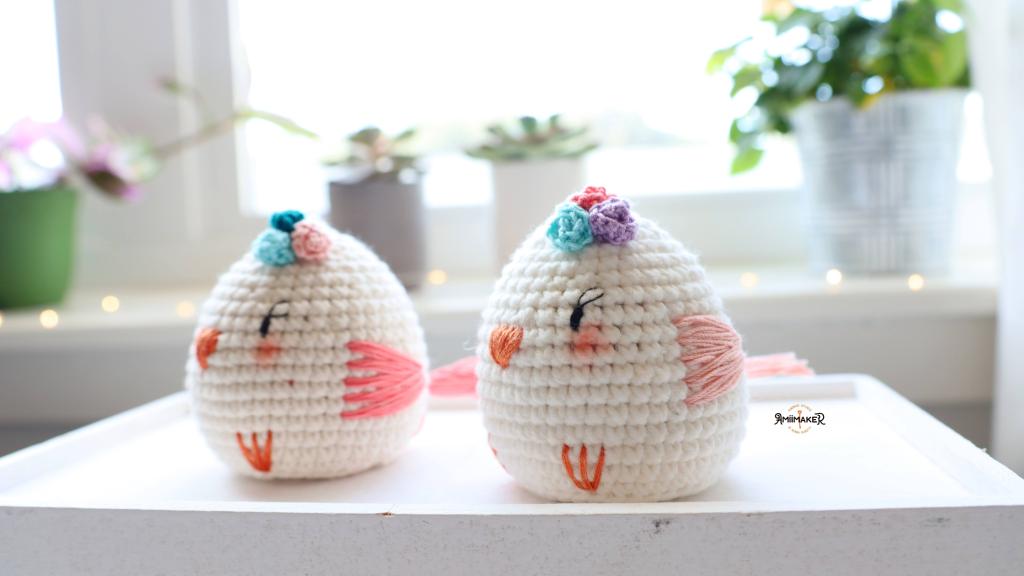
A ideia desse passarinho também veio meio sem querer, quando nasceu o unicórnio porta alfinetes. Mas eu não queria ficar fazendo bico e asas de crochê. Queria que ele tivesse detalhes delicados, meio que embutidos mesmo. E foi aí que resolvi tentar bordar tudo. Pra mim, deu certo.
Por ser um tutorial mais complexo, criei esse arquivo com a receita do corpinho, as explicações dos bordados e com o link para o vídeo tutorial que está no meu canal do YouTube. Espero, de coração, que vocês gostem! E, como sempre, qualquer dúvida, não hesitem em me escrever.
Look, I have to admit: I suffer a lot while recording tutorials! I make mistakes, start over, make mistakes again, start to sweat, lose my mood, give up, come back, start again and so on. But I couldn’t find a better way to create this tutorial than by video, so I took the courage and did it. I don’t even need to say that I suffered a lot while doing it, right?!
But I think it was worth it. This is all because, in my opinion, embroidering amigurumis can be a mystery, especially when we are beginners. I remember that the first time I embroidered something on an amigurumi, it was a snout on a knitting rabbit I made in April 2015. Making the rabbit was easy, as it was just a square that after a few tyings turned into a rabbit. The problem started when it was time to embroider the muzzle. I lost hours of my day and wasted a lot of thread. Tired, I started looking for some tutorials on YouTube. But I found nothing.
I finished the rabbit and only showed it to Gustavo and my mother. The poor thing was awful. I gave it away before Celso was born (maybe he would cry when he saw the rabbit… Hahahahahahaha!)
Today, years later, embroidering a detail on an amigurumi no longer scares me (maybe a little bit). I don’t always get it right the first time, but the chance of it not working is usually pretty low. Years of practice brought intimacy with the technique. And, perhaps, this is the most valuable tip of all: practice. Start by embroidering small details like eyebrows, for example. Always try to embroider something so you don’t lose your hand and little by little everything becomes more natural.
The idea of this little bird also came a little unintentionally, when the pin cushion unicorn was born. But I didn’t want to be crochet beak and wings. I wanted it to have delicate details, kind of embedded. And that’s when I decided to try to embroider everything. For me, it worked.
As it is a more complex tutorial, I created this file with the pattern for the little body, the explanations of the embroidery, and the link to the tutorial video that is on my YouTube channel. I sincerely hope you like it! And, as always, any questions, don’t hesitate to write to me.
Note: the video is in Portuguese but it is very visual. I talk about embroidering threads and needles at the beginning. And then I start showing how to embroider the details.
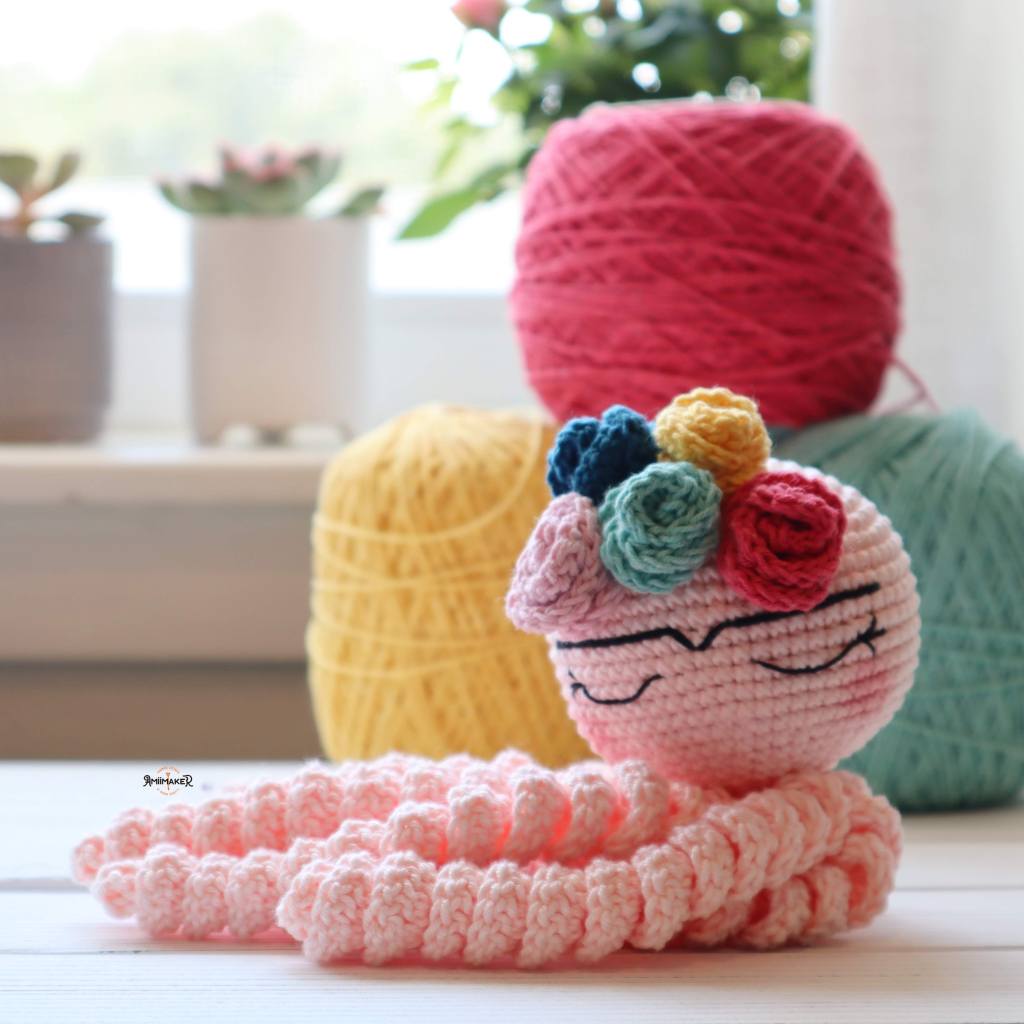
Essa florzinha do Polvinho Frida já foi alvo de muitos questionamentos, rs! Quando a receita foi disponibilizada no meu Instagram em 2019, a forma como eu escrevi a parte da flor não especificou que os 8 pontos altos deveriam ser todos feitos na mesma correntinha de base. Com isso, várias pessoas tiveram dúvidas e vieram me perguntar, já que o número de pontos não fechava.
Então agora temos um vídeo tutorial da florzinha! Oba!!! Eu reescrevi a parte da flor para a versão da receita em PDF do blog, mas achei legal também gravar um vídeo mostrando como eu faço. Espero que ajude! Nesse tutorial eu estou muda (ufa!), mas tem legenda, rs!
Beijos e até breve!
Music: Call Me
Musician: LiQuYD
Hi!
This Frida Octopus’ little flower has already been the target of many questions, lol! When the pattern was posted on my Instagram in 2019, the way I wrote the flower part didn’t specify that the 8 double crochets should all be made on the same chain. With that, several people had doubts and came to ask me, since the number of stitches weren’t right.
So now we have a tutorial video of the little flower! Wow!!! I rewrote the flower part for the pattern’s PDF version of the blog, but I thought it was cool to also shoot a video showing how I do it. I hope it helps! In this tutorial I’m speechless (whew!), but there’s a subtitle, lol! See the tutorial above.
Tenho tentado estar mais presente aqui no blog. Esse negócio de rede social acaba dominando a vida da gente, e quando a gente vê, parece que todo o resto ficou pra trás. Mas esses dias fiquei lembrando que quando criei o blog, o objetivo era trazer o meu dia a dia de crocheteira para cá, alem de compartilhar coisas legais do mundo do crochê. E isso acabou não acontecendo na frequência que eu gostaria…
Foi aí que resolvi começar, aos poucos, a compartilhar aqui receitas gratuitas criadas por mim que até então só estavam no Instagram. Assim fica tudo guardado em um único site pra caso um dia esse tal de Instagram sair de moda. Sendo assim, hoje teremos a primeira de várias (assim espero, rs).
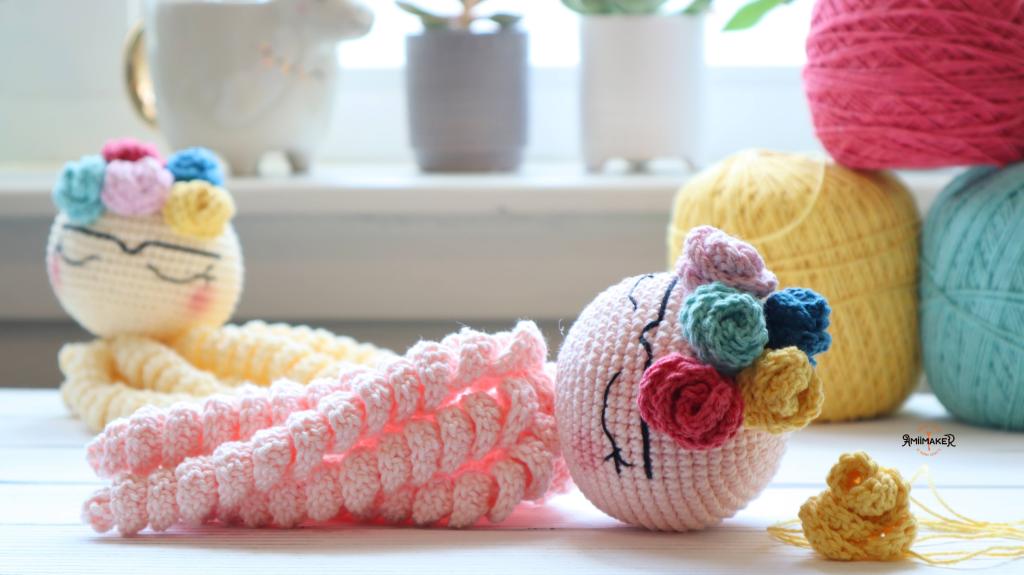
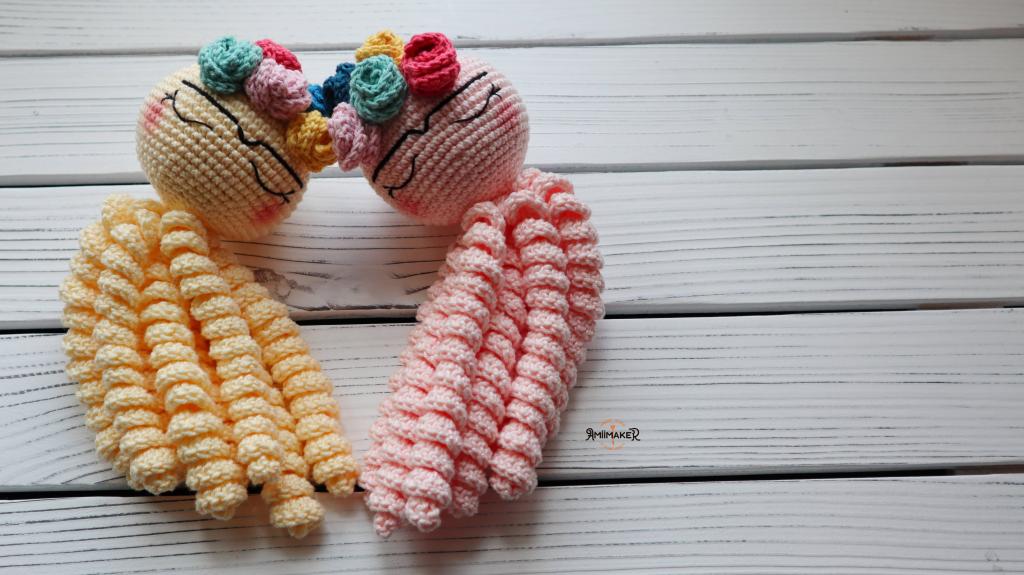
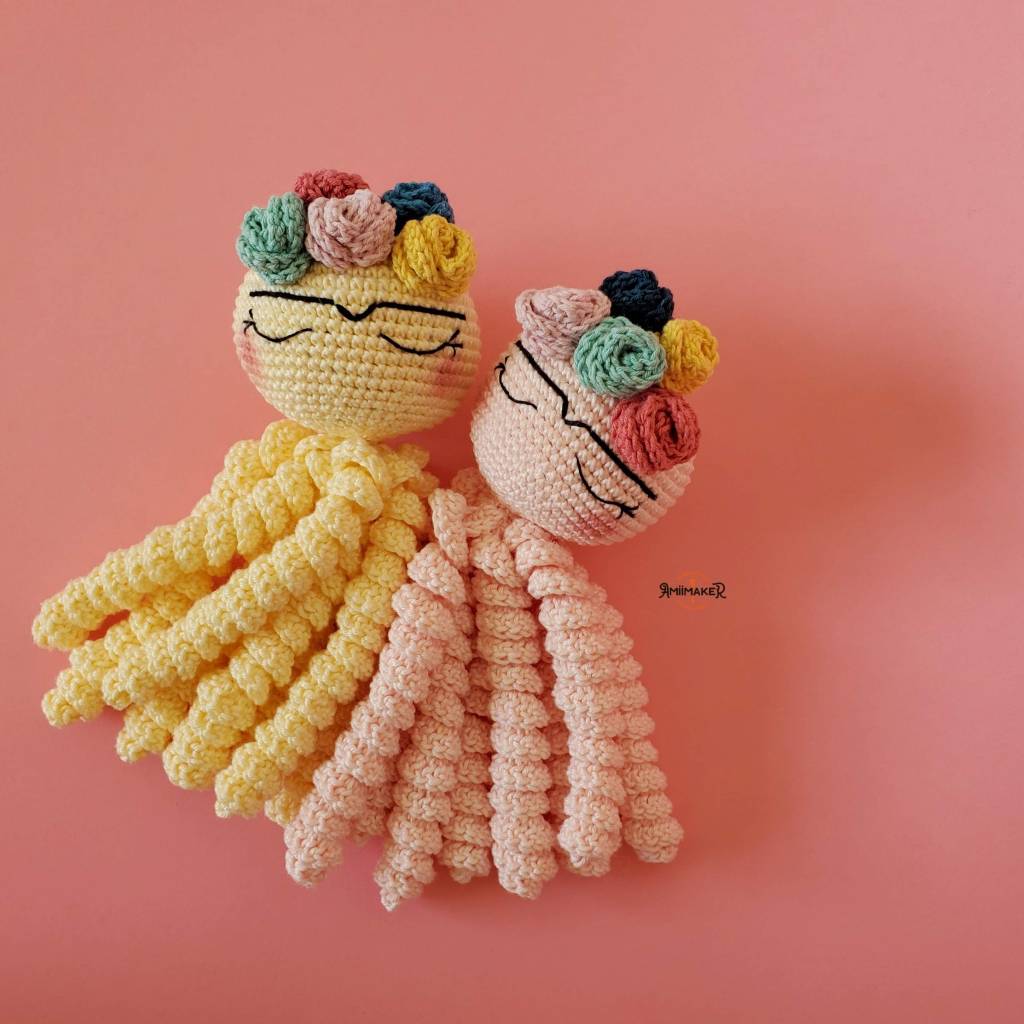
Sem mais delongas, essa é a receita do Polvinho Frida. Ela foi criada para comemorar os 2 anos da Amiimaker em 2020, como uma forma de agradecer a todo mundo que me acompanhava lá no Instagram (@amiimaker). A receita teve como base a receita do Polvo Soninho, daí adicionei flores, sobrancelhas e muitas cores para combinar com a primavera que estava chegando por aqui quando a receita foi criada. Agora que a primavera está chegando aí no Hemisfério Sul, a receita estará também aqui no blog. Assim podemos fazer o download e carregar ela com a gente pra onde a gente quiser. E se você estiver buscando inspirações para fazer o seu Polvinho Frida, procure pela #amiimaker para ver o que o pessoal já fez por aí!
I’ve been trying to be more present here on the blog. This social networking “fever” takes a lot of time of our lives, and when we realize it, it seems like everything else was left behind. But these days, I remembered that when I created the blog, the goal was to bring my daily crochet work here and share cool things from the crochet world. And this ended up not happening as often as I would like…
That’s when I decided to start, little by little, sharing here free patterns created by me that until then were only on Instagram. So everything is saved on a single site in case Instagram goes out of style one day. So, today we will have the first pattern of several (I hope so, lol).
Long story short, this is the Frida Octopus pattern. It was created to celebrate Amiimaker’s second anniversary in 2020, as a way to thank everyone who followed me there on Instagram at that time (@amiimaker). The pattern is basically the same as in my Sleepy Octopus, then I added flowers, eyebrows, and lots of colors to match with Spring that was coming here when the pattern was created. Now that Spring is approaching in the southern hemisphere, the pattern will also be here on the blog. This way we can download it and take it with us wherever we want. And if you’re looking for inspiration to make your Frida Octopus, look for #amiimaker to see what other crocheters have done out there!
Que eu adoro colocar um micro botão nos meus amigurumis não é novidade. Além de deixar o amigurumi super charmoso, adicionar detalhes às nossas peças é uma ótima maneira de agregar valor ao nosso trabalho. E já faz um tempo que eu prometi fazer um vídeo mostrando para vocês como eu costuro essas miniaturas nas minhas peças.
Porém, como tudo aqui acontece num ritmo próprio, antes tarde do que nunca, aqui está o meu vídeo! É um tutorial simples e bem caseiro (vocês também já sabem que gravar e editar vídeos não é o meu forte), mas acho que ficou bacana e dá pra entender bem o processo todo. O resultado final é um botão bem preso e um amigurumi cheio de amor!
Apenas lembrando que se o amigurumi for para uma criança menor de três anos, o recomendado é que não se costure botões ou outras peças pequenas a ele.
Para esse tutorial, você vai precisar de:
*um amiguriumi *um botão *linha de costura ou fio de meada *agulha de costura compatível com o tamanho do buraquinho do botão *tesoura